 One of our favorite features in Chaos Intellect is the ability to install and run
Intellect directly from a memory stick or flash drive.
One of our favorite features in Chaos Intellect is the ability to install and run
Intellect directly from a memory stick or flash drive.
One of our favorite features in Chaos Intellect is the ability to install and run
Intellect directly from a memory stick or flash drive.
A flash drive plugs into the USB port on any current Windows PC. It offers more space than the old A: floppy disks did, and fits easily on your keychain or in your pocket or briefcase.
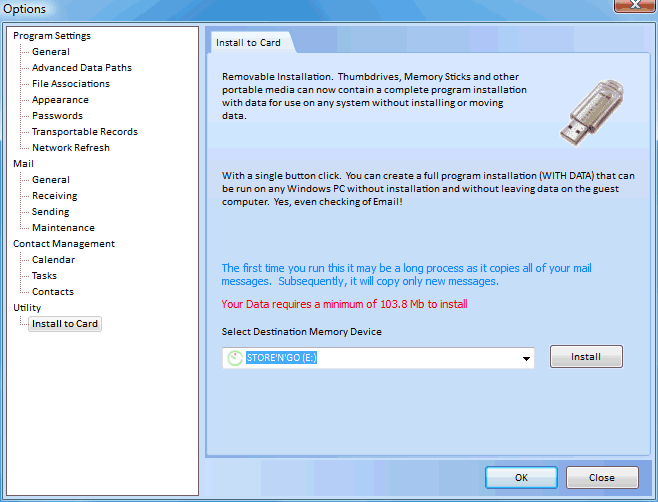
With the popularity of this type of media, we can now create a fully functional licensed version installed directly to and run from a USB Flash Drive. This allows you to attach the device to a guest computer to access data without leaving any apparent tracks on the guest system. This even includes sending and receiving email messages!
The version of your data you work with on the Flash Drive can be synchronized intellegently with your computer so that any changes and updates you make to your data in one place can be shared with both.
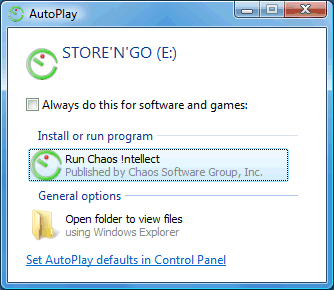
Once you have a flash drive ready to go with our software installed on it, you will be able to plug it into a computer where you will see a screen like this:
At the end of the installation process, you should have a few new folders on your flash drive. Your data has not been transferred yet, only the program and settings. You do get the following prompt, though, which takes you to the next step:
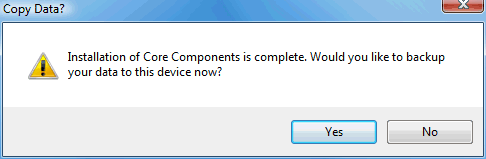
If you click "Yes" to the installation complete message, you will be taken to our "Sync with Removable Media" screen.
Please note that if you have done this directly from the "Install to card" screen, it will automatically fill in the data folder we created on your Flash Drive. The drive letter will depend on which letter your Flash Drive was assigned, but after the drive letter should be "My Documents\Chaos Data", which is similar to our default data location on your real PC.
 With your data on your flash drive, you are ready to go! But
if you use it, someday soon you'll want to come back to your "real" PC and bring
your data with you that you have been updating.
With your data on your flash drive, you are ready to go! But
if you use it, someday soon you'll want to come back to your "real" PC and bring
your data with you that you have been updating.
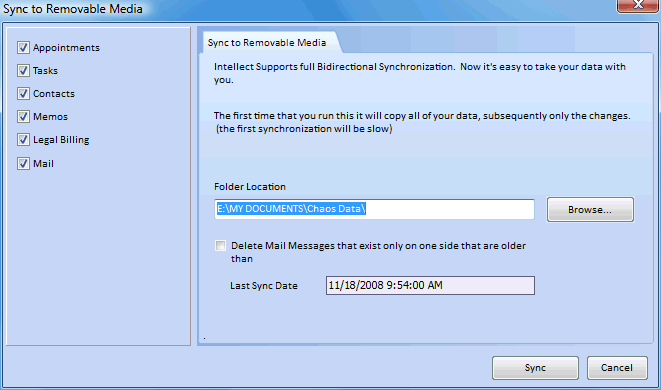
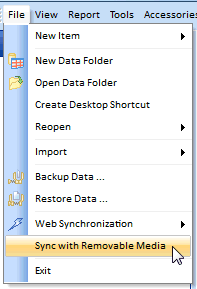
On the File menu is an option to Synchronize with Removable Media, which will take you back to the screen you did the initial sync from.
Please note the data location, which has to match the data location on the flash drive where you have been storing the data (not the program itself!)
If you chose to sync your mail messages, you see this check box option with the word DELETE and get nervous! And that's good common sense! But this option is turned on for a good reason and you will want to keep it turned on almost all the time. Here's why:
Suppose you delete a mail message from Intellect .... and that message file existed already on the removable media .... well you would likely want it also removed from the removable media .... right? If not it would keep re-appearing back in our Intellect after each sync.
So the solution is to select the option to: "Delete Mail Messages that exist only on one size that are older than ...." (which by default, will be turned on after your first sync)
Any new messages on either side will transfer just fine back and forth, both directions, because they will be NEWER than the last sync date!
So when would you not want to check this box? If you had an "Ooops" moment where you deleted messages and wished you hadn't, unchecking this option will revive the older mail that still exists on the other side rather than deleting them. Also, if there was some problem with your last sync where it did not finish for any reason, the Date in the "older than" field might be too recent to make good sync decisions on email. Either way, you can uncheck this box to have it merge email messages rather than delete any.
This help article applies to Intellect 3